Porsche, Buyer’s Guide
Porsche 986 Boxster and 911 996.2 Gauge Face Bubbling: Permanent Fix and DIY Replacement Guide
OEM gauge faces on Porsche 986 Boxster and 911 996.2 instrument clusters can start to bubble, wrinkle, or peel over time, especially in hot climates. In most cases, this cannot be permanently fixed by pressing the surface back down, cleaning it, or refinishing it. The durable long term solution is to replace the gauge faces.
In this guide, we explain the symptoms, the cause of the problem, the tools required, and the full step by step replacement process. Whether your goal is an OEM-like restoration or a custom design update, the installation process is essentially the same.
Quick Answer
If your Porsche 986 Boxster or 911 996.2 gauge faces are bubbling or peeling, replacement is the proper long term solution. Temporary cosmetic fixes rarely last. With the right tools, a clean workspace, and careful needle positioning, this is a manageable DIY job for most owners.
Which Porsche Clusters This Guide Applies To
This guide applies to Porsche 986 Boxster instrument clusters and Porsche 911 996.2 instrument clusters. It is intended specifically for surface bubbling, peeling, or blistering of the original gauge faces.
This guide does not cover LCD screen repair, electrical backlighting failure, or Porsche 997 needle wobble issues.
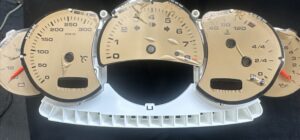
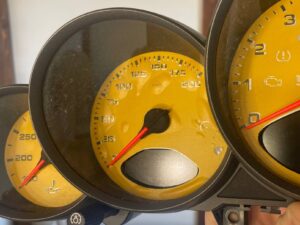
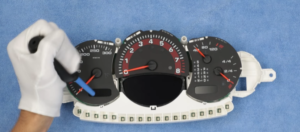
Common Signs of Bubbling or Peeling Gauge Faces
The problem usually starts as small raised areas, wrinkles, or bubbles on the surface of the dial. At first, the damage may appear minor, but over time it usually spreads. The top layer can continue to lift, peel, or develop an uneven texture that makes the cluster look worn and aged.
In many cases, the backlighting still works normally. The issue is mostly visual rather than electrical. What changes is the appearance of the dial surface, which no longer looks clean, smooth, or factory correct.
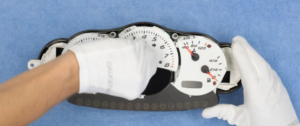
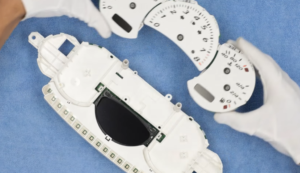
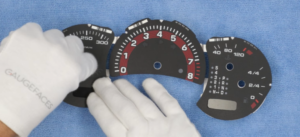
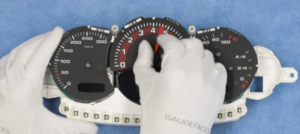
Typical bubbling and surface failure on an original Porsche gauge face.
Why Porsche 986 and 996.2 Gauge Faces Bubble
In real world use, this issue is most commonly associated with age, heat, UV exposure, and failure of the original surface layer. Cars that spend a lot of time in direct sunlight or hot climates often show the problem more severely.
Once the top layer starts to separate, the damage usually continues to develop. That is why cosmetic touch ups rarely hold up for long. They may improve the appearance temporarily, but they do not solve the underlying material failure.
Can Bubbling Be Fixed Without Replacing the Gauge Faces?
In most cases, no. If the original surface layer has already started bubbling or peeling, replacement is the proper long term solution. Trying to flatten the bubbles, hide them, or refinish the surface is usually temporary and often makes the result look worse.
Replacing the gauge faces is the clean and durable approach. It restores the appearance of the cluster properly and also gives you the option to keep an OEM-like look or switch to a custom design.
Is This a DIY Job?
Yes. For most careful owners, this is a DIY-friendly job. It is not especially difficult from a mechanical point of view, but it does require patience, good lighting, a clean work area, and careful handling of the needles, clips, and ribbon connector.
For a first time installation, expect the work to take around 1.5 to 3 hours. The main risks are dust trapped under the lens, fingerprints on visible inner surfaces, broken clips, incorrect needle resting position, or rushing the reassembly.
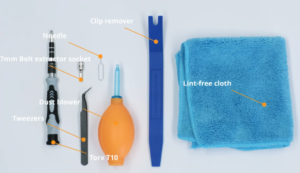
Tools You Will Need
The basic tools needed are a needle tool, a 7 mm bolt extractor socket, a trim clip remover, a lint free cloth, a Torx T10 driver, tweezers, and a dust blower.
It also helps to have a clean padded work surface, good overhead lighting, and a plastic pry tool or spudger for clip release. Gloves are optional, but many owners prefer them to reduce fingerprints on inner surfaces.
Before You Start
Set up a clean table and make sure there is as little dust in the area as possible. This matters more than most people expect, because once the cluster is back together, even one small speck trapped under the lens can be visible.
Before taking anything apart, study the needle positions and take clear reference photos. Work slowly when opening clips and connectors. Do not force anything. Most damage during a job like this happens because a part is rushed or pulled at the wrong angle.
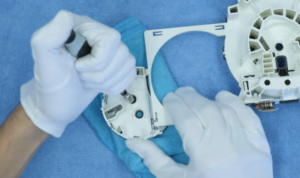
Step by Step Replacement Guide
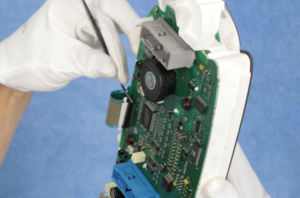
Stage 1. Open the Cluster Housing
Start by positioning the cluster as shown and removing the highlighted metal screws (1). Then unfasten the side clips (2). Remove the rubber cap from the side button (3) and carefully unhook the plastic clips to separate the front part of the housing (4).
 1
1 2
2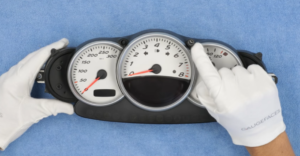 3
3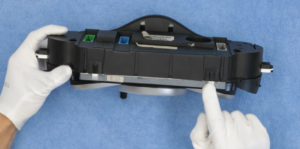 4
4
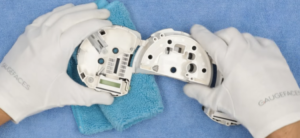
Stage 2. Remove the Needles and Inner Parts
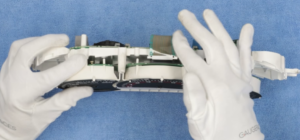
Once the front section is off, remove each needle carefully (5). Rotate each needle from the highest number down toward the lowest stop, then gently pull it off. After that, remove the back part of the cluster (6) and take out the two plastic rods (7).
Needle handling must be done gently and consistently. Do not twist aggressively or pull at odd angles. Set the needles aside safely so they cannot be bent, scratched, or mixed up.
 5
5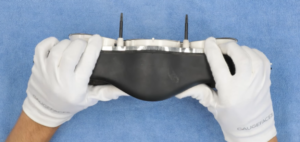 6
6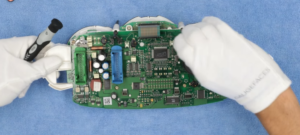 7
7
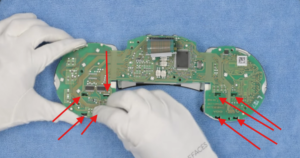
Stage 3. Disconnect the Board
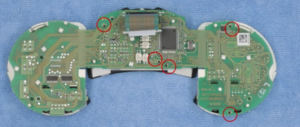
Open the FPC connector (8) and remove the bolt near the ribbon cable (9). Then unfasten the two white clips at the top (10) and the two clips inside (11). After that, separate the board from the rear white section (12), remove the highlighted bolts (13), and carefully disconnect the black clips for the displays before lifting the board (14).
Move slowly here. Ribbon connectors and display clips are not the place to use force. If something does not release easily, stop and check the angle and clip position again.
 8
8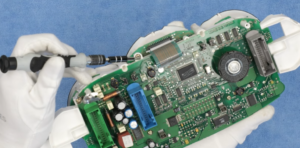 9
9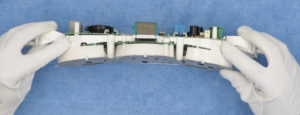 10
10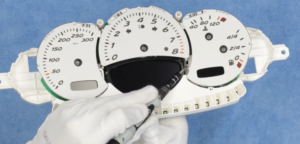 11
11
 12
12
 13
13
 14
14
Stage 4. Remove the Original Gauge Faces
Fold a lint free cloth several times and place it under the cluster to protect the surface (15). Then use the 7 mm bolt extractor socket with a gentle rocking motion on the clips that secure the original gauge overlay (16&17). This allows the old gauge faces to be removed without damaging the surrounding structure.
 15
15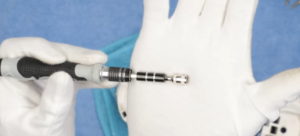 16
16
 17
17
Stage 5. Install the Replacement Gauge Faces
Position the replacement gauge face carefully and secure it with the round clips (18&19). Then reinstall the board, fasten the black clips (20), and reinstall the highlighted bolts (21).
At this point, alignment matters. Before fully committing to reassembly, make sure the replacement face is seated properly and that nothing is pinched, shifted, or contaminated with dust.
 18
18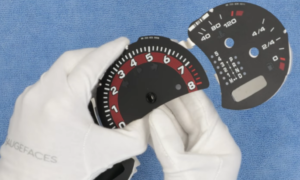 19
19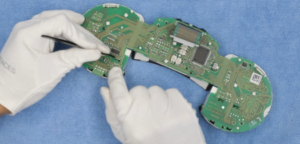 20
20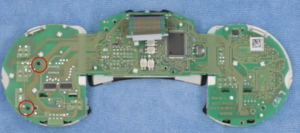
 21
21
Stage 6. Reasseemble the Cluster Internals
(22) Put the rear section back in place while being careful with the ribbon cable at the top. (23) Then fasten the two clips between the displays and the two clips at the top of the cluster, and reconnect the ribbon cable.
 22
22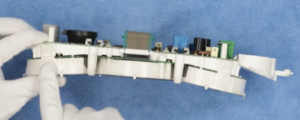 23
23
Stage 7. Refit the Needles
(24) Reinstall the needles carefully and return them to their original resting positions. Place them at the high side and move them gently down to the correct resting point. The important part is consistency and accuracy.
 24
24
Stage 8. Clean, Test, and Close the Housing
Before sealing the cluster, use (25) a dust blower and (26) cloth to clean the inside surfaces. Then (27) reattach the lower part, (28) return the plastic rods to the factory position, (29) place the rear part of the housing back on, and insert the front part.
(30) Test the cluster on 12V before fully finishing the installation if possible. After that, reinstall the remaining bolts, fasten the side clips, reinsert the side button cap, and complete the job.
 25
25 26
26 27
27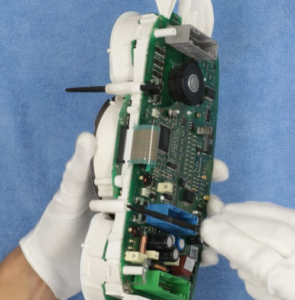 28
28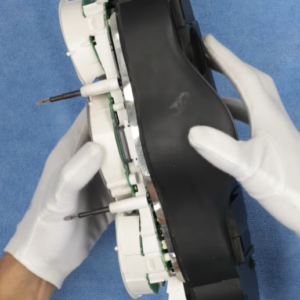 29
29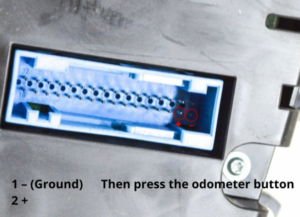 30
30
Common Mistakes to Avoid
One of the most usual errors is to trap dust underneath the lens. Another one is to touch the visible inner parts with bare fingers which causes leaving marks that are very hard to get rid of once the cluster is closed.
The third common mistake is to rush the needles. If the needles are not put back to their proper resting positions, then the cluster may still look quite nice visually but it will behave in a wrong way afterward. Last but not least, do not ever force clips or connectors. If one aspect does not feel right, then you need to stop and check it before proceeding with the operation.
OEM Look or Custom Design?
You do not necessarily have to alter the visual style of the car in your repair. In fact, most owners just want to bring back an original factory-like look and have the bubbling removed for good. On the other hand, some use that repair phase as a change to their cluster by picking a different color, increasing contrast, changing the units, or even creating their own design.
Either method is viable.
The main thing is that the new piece must be precise, well-made, and correctly fitted.

FAQ
Can I permanently fix bubbling without replacing the gauge faces?
Usually no. Once the original surface has started bubbling or peeling, the proper long term fix is replacement.
Will the backlighting still work after replacement?
Yes, provided the replacement faces are designed correctly for the cluster and installed properly.
Is this job suitable for beginners?
Yes, if you are patient and careful. This job is more about cleanliness and attention to detail than advanced mechanical skill.
How long does the job take?
For most first time installations, around 1.5 to 3 hours is a realistic range.
Can I keep the cluster looking factory?
Yes. Many owners replace damaged OEM faces with OEM-like replacements specifically to restore the original look.
Do I need to pay special attention to the needles?
Absolutely. Needle positioning is one of the most important parts of the process, and it should be checked carefully before final closure.
Final Thoughts
If your Porsche 986 Boxster or 911 996.2 gauge faces are bubbling or peeling, replacement is the right long term solution. It is cleaner, more reliable, and more professional than trying to hide the damage or temporarily flatten it.
When done carefully, the result can look fully OEM-like and dramatically improve the appearance of the interior. Work cleanly, handle the needles and clips with care, and do not skip the test step before final installation.
Need Replacement Gauge Faces?
If you are dealing with bubbling or peeling gauge faces, make sure the replacement set is designed specifically for your exact cluster version and made to a high standard.
Contact us about Porsche 986 and 996.2 gauge face replacement