Gauge needles usually fail after instrument cluster installation for a small number of repeat reasons. The most common causes are excessive pressure during reinstallation, incorrect resting position, insufficient clearance above the gauge face, bent needles, internal stepper motor damage, and hidden wear inside the cluster. If a needle breaks, sticks, drags, jumps, or reads incorrectly after reassembly, the issue is usually mechanical alignment, installation technique, or a pre existing cluster fault rather than the printed gauge face itself.
After replacing gauge faces, removing needles, or reassembling an instrument cluster, one of the most common customer complaints involves the needles. Some break during installation. Some sit too close to the dial and stop moving freely. Others appear to work at first, but then drag, stick, jump, read incorrectly, or fail to return to zero.
In most cases, the printed gauge face is not the real problem. The root cause is usually pressure, alignment, needle seating depth, internal wear, or damage to the mechanism during installation. This guide explains the most common reasons for gauge needle issues after instrument cluster reassembly and how to prevent them.
Quick Answer
If a gauge needle breaks, sticks, or reads incorrectly after installation, the most likely causes are:
- Too much pressure during reinstallation
- Needle seated too low and rubbing the face
- Incorrect zero position
- Bent needle or uneven seating angle
- Internal stepper motor or shaft damage
- Warped or uneven gauge face seating
- Dust or debris inside the cluster
- Pre existing wear or electrical issues inside the cluster

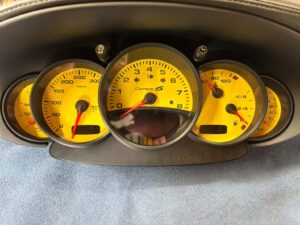
Example of a custom Porsche cluster after installation. Even when the final look is excellent, needle height and resting position must be checked carefully during assembly.
Most Common Gauge Needle Problems After Reassembly
The most frequent complaints usually sound very similar:
- My needle broke during installation
- The needle is stuck after reassembly
- The needle works but reads incorrectly
- The needle does not return to zero
- The gauge works in one range but sticks in another
- The needle jumps or moves erratically
- The needle feels loose after removal
Most of these complaints come from the same small group of causes, excessive pressure, poor alignment, incorrect seating depth, wrong zero point, internal mechanism damage, or hidden cluster wear.
What Causes a Gauge Needle to Break During Installation
One of the most common reasons a needle breaks is excessive force during removal or reinstallation. Many installers assume that pressing the needle down firmly will make it more secure, but in reality this often creates the opposite result. The hub can crack, the shaft can be stressed, or the needle can sit too low and start rubbing the face.
This risk is even higher on older clusters. Plastic becomes brittle with age, heat cycles, and exposure to sunlight. A needle that looks perfectly fine can still crack under moderate pressure if the material has already weakened over time.
Another cause is uneven pressure. If the needle is pushed from one side or twisted while being seated, it can bend or damage the center mounting point. A broken needle is not always the result of one large mistake. Sometimes it is the result of small but repeated force applied at the wrong angle.
Why a Gauge Needle Sticks or Drags After Reassembly
The most common reason a needle sticks after reassembly is that it was pressed too far down onto the shaft. When this happens, the needle sits too close to the dial surface and starts rubbing against the face. This creates drag, delayed return, or complete sticking.
Sometimes the problem appears only in part of the range. A needle may move normally near zero, then drag or freeze at a certain speed or RPM. In that case, the issue is often clearance related rather than total mechanical failure.
A needle can also drag because it is slightly bent, seated at an uneven angle, or brushing against another nearby component inside the cluster. Even a small contact point can affect smooth movement.
Why Gauge Needles Read Incorrectly After Installation
If the needle still moves but shows the wrong value, the most likely cause is incorrect zero positioning. Even a small error in the resting position can create a noticeable reading difference once the cluster is powered again.
This is why installers should always document the original needle position before removal. A photo taken straight on, with the cluster fully at rest, is one of the simplest ways to reduce installation error.
Some clusters also perform a self check or calibration movement when power is restored. If the needle was reinstalled in the wrong position, the error becomes visible immediately. Speedometer, tachometer, fuel, temperature, and voltage readings can all be affected.
Hidden Cluster Problems That Are Often Mistaken for Needle Issues
Not every needle complaint is caused by the new face or the installation process itself. Sometimes the real issue already existed inside the cluster. A worn stepper motor, weak shaft, brittle plastic, aging solder joints, unstable voltage, or poor connector contact can all create symptoms that look like a needle problem.
This is especially common in older clusters. The unit may have been functioning well enough before disassembly, but once it is opened and reassembled, a hidden weakness becomes much more obvious. Customers often assume the new gauge face caused the fault, when in reality the cluster mechanism was already compromised.
Electrical issues can also imitate mechanical ones. A jumping tachometer, an unresponsive fuel gauge, or a dead temperature needle may be related to the board, the connector, or the power supply rather than the physical needle.
Other Frequent Causes of Gauge Needle Complaints
Beyond pressure and zero position, there are several other common reasons customers report problems after installation:
- Bent needle, the needle may look normal at first but rub during part of its sweep
- Uneven installation angle, one side sits lower than the other
- Warped gauge face seating, the dial is not perfectly flat under the needle
- Dust or debris inside the cluster, small particles can interfere with smooth movement
- Internal shaft or motor damage, especially after aggressive needle removal
- Age related material fatigue, old components may fail during an otherwise normal installation
Installed cluster showing how visual alignment can appear correct while needle seating depth still needs functional testing.
How to Prevent
Gauge Needle Problems During Gauge Face Installation
The safest installation process is slow, controlled, and test focused.
Before removing any needle, photograph the cluster straight on with the needles fully at rest. During reinstallation, place each needle lightly first and do not press it fully down immediately. Check that it moves freely and sits at the proper height above the face. Only after confirming free movement should it be seated more securely.
It is also important to test the cluster before final assembly whenever possible. A quick function check can reveal rubbing, incorrect zero position, erratic motion, or poor return before the clear lens and trim are fully installed.
Installers should avoid forcing old needles. Aging plastic becomes fragile, and unnecessary pressure can easily crack the hub or damage the shaft. A careful installation process is always safer than trying to correct an issue after the cluster is fully closed.
Why Needle Problems Are So Often Misunderstood
Many customers believe that if the needle stopped working after a new face installation, the dial itself must be responsible. In reality, the face is often only part of the environment around the needle. The real cause is usually one of three things, pressure, alignment, or pre existing cluster weakness.
This matters because the correct fix depends on the real cause. Pressing the needle down harder will not solve a wrong zero point. Replacing the dial will not fix a worn stepper motor. Reinstalling the cluster again will not help if the needle is bent or the hub is cracked.
The best results come from treating the needle assembly as the most delicate part of the cluster, because in many cases it is.
FAQ
Why do gauge needles break during installation?
Gauge needles usually break because too much force is applied during removal or reinstallation. Older needles are often fragile, and the plastic center hub can crack under pressure.
Why is my gauge needle sticking after cluster reassembly?
The needle is often seated too low and rubbing the gauge face. It can also stick because of a bent needle, poor alignment, debris inside the cluster, or hidden internal motor issues.
Why is my speedometer or tachometer reading incorrectly after installation?
This usually happens when the needle was reinstalled in the wrong resting position. Even a small zero point error can cause inaccurate readings.
Can a new gauge face cause needle problems?
A gauge face itself does not usually cause the problem unless it is not seated flat or there is insufficient clearance. Most issues come from pressure, alignment, or pre existing cluster wear.
Why does the needle work in one area but stick in another?
This usually means the needle is rubbing only in part of its sweep. Common reasons include incorrect seating depth, a slightly bent needle, or an uneven dial surface.
Can old instrument clusters develop hidden problems during installation?
Yes. Older clusters often have brittle plastics, worn shafts, weak motors, aging solder joints, or unstable internal electronics. Installation can reveal a fault that already existed.
Final Thoughts
Most gauge needle problems after instrument cluster installation come from a small number of repeat causes. The most common are excessive pressure during installation, insufficient clearance above the gauge face, incorrect zero positioning, bent or damaged needles, internal stepper motor issues, and age related wear inside the cluster.
For that reason, the best installation process is not just about replacing the face correctly. It is about protecting the needle, preserving its original position, maintaining proper height, and testing movement before final assembly.
When done properly, a gauge face installation should not create needle problems. When done carelessly, even a perfect dial can be blamed for a problem that actually came from force, alignment, or hidden cluster wear.
At GaugeFaces, we do not treat a cluster as just a printed part. Fitment, readability, installation safety, and long term usability all matter. That is why proper assembly technique and needle handling are just as important as the final design itself.